Older article “rescued” from Internet, not maybe of much use these days, but still some interesting tidbits for resuscitating old Amigas… 😉 
Disclaimer
I have here described as exactly as I am able to how I did when I built my Amiga 3000 into a standard atx tower case. I leave no quarantees whatsoever that the same project will be a success for anybody else and I take no responsibility for damages on any equipment for anyone that tries to follow my example.
Since english is not my native language there may be faults in the translation. If you detect any fault, please contact me.
This is what I used:
an Amiga 3000 an ATX case (surprised?) a drilling machine an electric saw some screwdrivers of different shapes some screws some wire connection equipment lots of adhesive tape an extension flex for the keyboard a 9 pin extension flex for the mouse a “Powered By Amiga”-label (important!)
1. The pure mechanical bit (fitting the Amiga in the atx box)
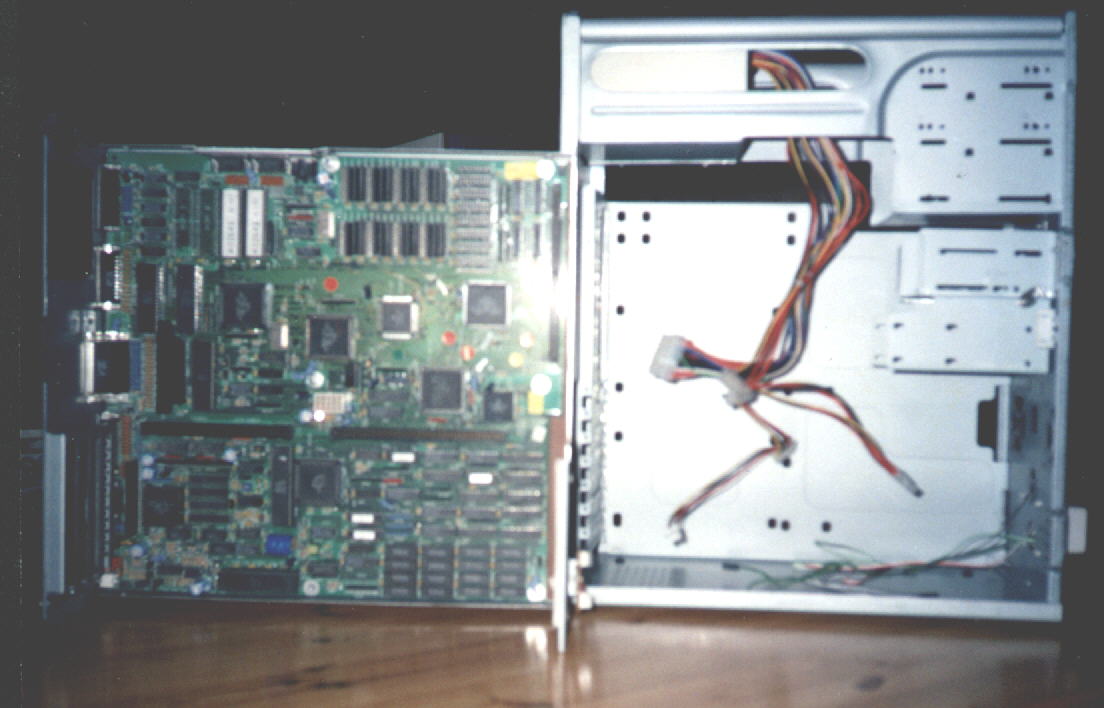
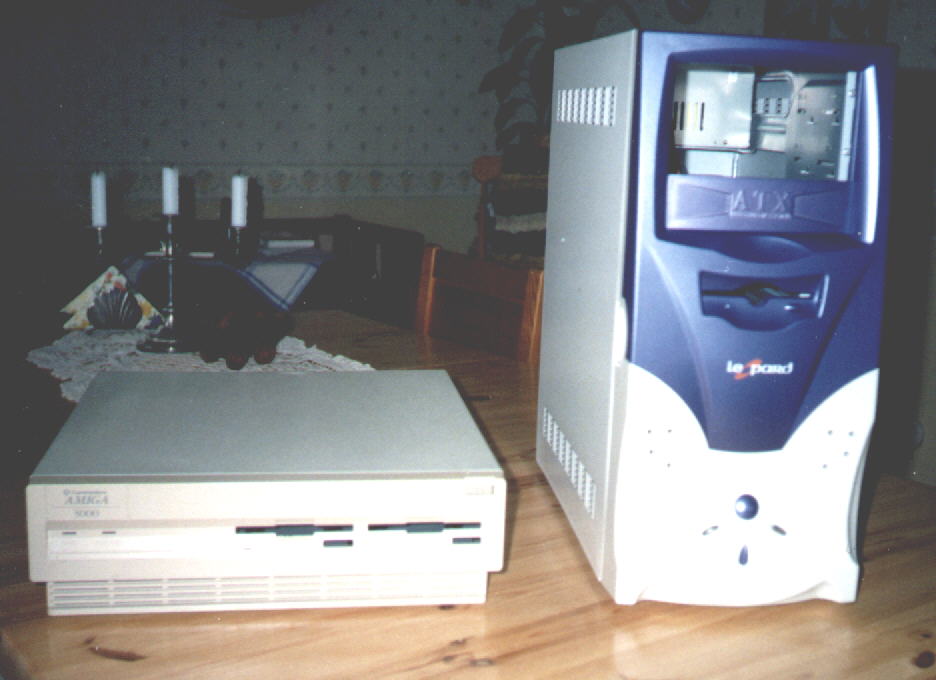
The only reasonable way to put the A3000 motherboard in a tower case is with the I/O ports at the back of the case. This results in a couple of problems. One example is the Zorro3 ports, wich points downwards. Another example is the mouse/joystick/keyboard connectors, which points upwards inside the case. This can be solved by quite much massacring of both the Amiga case and the atx case. The way I solved it, I built the original Amiga case into the atx case after having removed much that wasn’t needed of the cases. The only part really needed of the Amiga case is the backside (with all the I/O ports). It’s also handy to save the part with the rails for the Zorro boards. Thus the easiest way is to save the entire bottom plate of the Amiga case.
The first thing I did was to drill rivets on the atx case. I totally removed the 3.5″ holders and the rectangular piece in the backside where the atx I/O ports are positioned. It has almost exactly the same shape as the backside of the A3000, which is very nice. I hade to saw a bit for the serial port and one of the audio ports, but besides that it fitted perfectly.
I also had to remove part of the holders for 5.25″ units. There were place for three units before my treatment, but the I had to remove the downmost since the A3000 motherboard is much bigger than a atx board.
Another quite big (but very simple) engagement was that I sawed a big rectangular hole in the bottom of the case to take in/out Zorro boards through. Since the Zorro ports are pointing straight into the “floor” of the case, this was the best solution I could come up with… (and how often do you need to take in/out boards anyway?) A little warning here: I did my hole a bit too narrow, which means that I for now only can use three of four Zorro slots (until I bother to dismount the computer and make the hole bigger). So be sure to make the hole big enough!
After that it’s just to try push the Amiga into the case, watch why it didn’t fit and take away anything that was in it’s way 🙂 (it took me quite many tries, it’s just to continue until success…) As long as one has a fair idea of what’s needed and what’s not it’s just to saw… After that I fixed the A3000 case into the atx case (drilled a pair of holes and screwed it tight). I had some trouble getting the motherboard in place, but after some further sawing I had it exactly where I wanted.
Another slight problem that I discovered when I was almost finished was that the mouse/joystick ports were pointing straight into the case’s power supply. I solved this by buying a 9 pin serial extension flex at nearest pc dealer, remove all unnecessary plastic on one of the connectors and force the power supply in place next to the connector by using extreme violence. What isn’t succeeded with violence is succeeded with more violence 😉
This part took me about six hours. But then there’s not much work left…
2. The electrical part (power supply, power button, power/hd leds etc)
The connection of the atx power supply to the A3000 motherboard is not very difficult. Almost all of the voltages needed are there, it’s just about where to connect them. Since I’m not very good at soldering I simply cut the cables from the both power supplies and connected the wires from the atx power supply to the wires going to the motherboard. Here is a list of exactly which wires should be connected:
| ATX | Amiga | Voltage |
|---|---|---|
| black (possibly green, see below) | blue | ground |
| red | yellow, green, purple | +5V |
| white | white | -5V |
| yellow | orange | +12V |
| blue | red | -12V |
The only voltage that is needed and that isn’t there is TICK (brown wire). There is however a jumper on the mother board (J350) where one can choose that the TICK-signal should be generated in other ways, so TICK isn’t needed from the power supply. Another voltage that is different is something that is in the A3000 manual marked as +VID. I don’t really know what this is, but I measured on the wire and came to the conclusion that it’s simply +5V, and it works well to connect it to +5V. There is also some wires from the power supply that is not needed and that shouldn’t be connected anywhere. These are orange, brown, grey and yellow and are +/- 3V, PWR_OK and +5VSB.
An important detail in getting the power supply to deliver any voltage at all is PS_ON (green wire). When PS_ON is not connected to ground the power is off. This is nice, because if one wants to use the power button on the front of the case, PS_ON can be connected to ground via the button, and the power will be turned off when the button is pushed. The problem is that the switch that’s in the box from the start is the model that is just “on” as long as you hold it, whereas you need a button that is on the first time you press it and off the second (get it?). Well, I took the switch from the original A3000 power supply and fixed it with (quite a lot) tape (yes, it is possible if you fiddle with it for a while). Of course PS_ON can be connected directly to ground if you think that’s easier. The only difference is that the button on the case can’t be used.
The connection of the leds on the front isn’t very hard either. It’s just to look how the old leds are connected and do it the same way. I happened to connect the hd led the wrong way, which caused me some trouble before I realized what was wrong (this is no big problem. If the led isn’t shining, it’s just to connect it the other way…)
3. A little of everything
Now I think I’ve gone through everything neccessary for using the computer. The stuff that follows is the things that just makes the computer nicer…
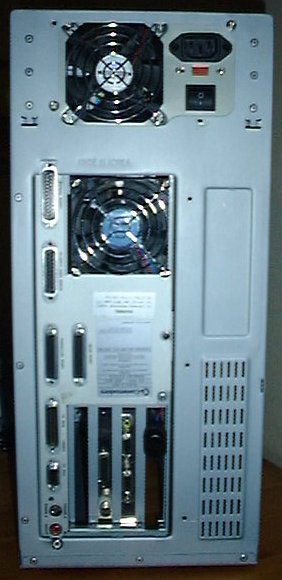
Since I don’t use the A3000 power supply, there’s a big gaping hole where the power supply fan would have been. I solved this by removing the fan from the power supply and put it in the hole. I put the fan on the inside, the fan grill on the outside and screwed a screw in each corner and it looks really nice. Power for the fan can be taken from any hd power cable. I discovered quite fast that the A3000 fan was the most noicy thing in the entire computer, and therefore I wired the power to the fan through a switch which I mounted at the backside of the computer so that i can turn the fan off when I’m tired of the noise 😉
Since I removed the 3.5″ holders from the case there was no place to put my harddisks. On the other hand there was lot of empty space in the back of the case (under the power supply). So I took the 3.5″ holder and mounted it under the power supply with a pair of angle irons, some screws and a drill. So now there’s space for two 5.25″ units with frontplace and three 3.5″ units at the back of the case.
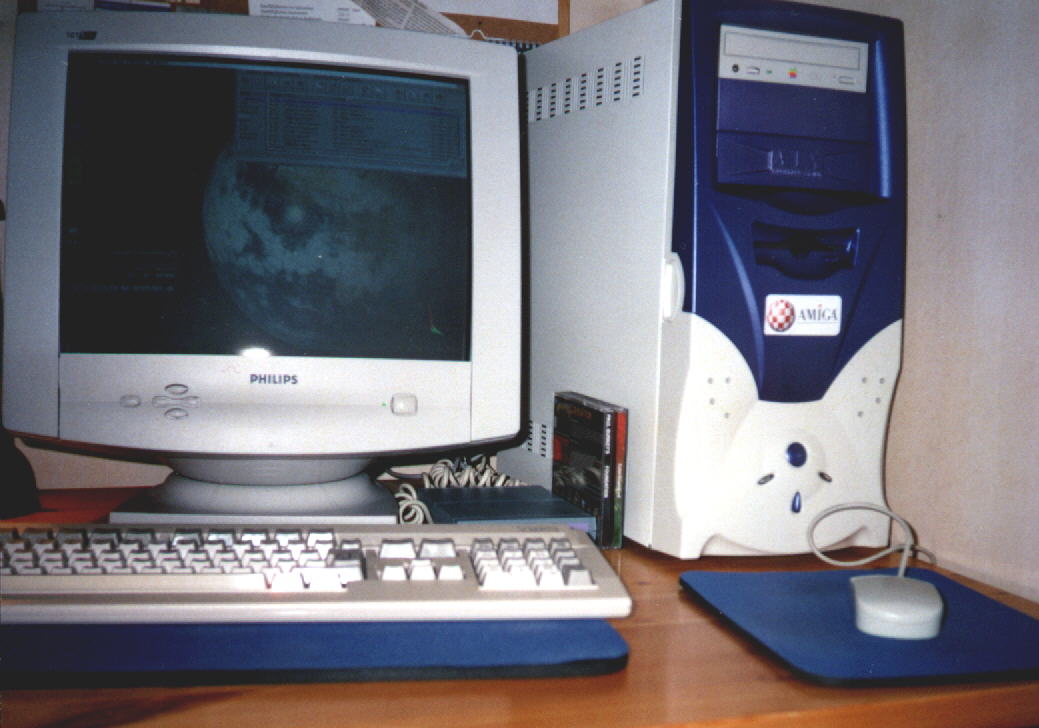
One very important detail of course is to show that the computer is an Amiga, so that nobody thinks it’s a Pentium in the case. I solved this by buying a “Powered By Amiga” label and put it on the front. It looks really nice…
Comments/Experiences
 Now (a year after towerizing my A3000) I’ve bought a Prometheus. The Prometheus is a Zorro3 connected card with four PCI slots. The slots are angled so that they point 90 in degrees angle away from the motherboard. Which means that all my PCI cards points the way cards in a normal tower computer do. This also means (since I don’t use any other Z3 cards than the Prometheus any longer) that the big hole that I made in the bottom isn’t used any more. So if you buy a Prometheus before building your computer into a tower you don’t need to use your saw as much as I did 😉
I’ve also had some problems with heat in my computer. In spite of the extra fan that I put in the back of the computer and a small fan that I positioned on my Voodoo3 chip it happens during the summer (when the temperature in my room is above 28 degrees (Celsius)) that the computer spontaniously reboots. This shows the importance of the heat having somewhere to go. So be careful!
Questions
If it’s anything that’s unclear about my description please contact me so that I can explain or correct it. I will of course be pleased to help anyone that is towerizing his Amiga and needs help. Anyone who is a friend of Amiga is a friend of me 🙂
Files that could be good to look at
Specification of the atx standard (pdf)
Specification of the atx power supply (pdf)
Amiga 3000 power supply (text)
Some additional Photos
This text is (c) Daniel Eriksson, published and archived on this site with authors permission
I found original article on website many years ago and it was big impact on my A600T project. Now when reading it again here, old memories back to me. This is a great project of moving A3000D into PC tower.
Hmm is anyone else having problems with the pictures on this blog
loading? I’m trying to find out if its a problem on my end or
if it’s the blog. Any feed-back would be greatly appreciated.